
As you all know I recently completed (well...kind of) a circle of geese block which turned out less than acceptable. I promised I would try one more time before I gave up. What I discovered were very simple mistakes which, when corrected, made this block a pleasure to make. This is not a tutorial for advanced quilters as they would not have made dumb mistakes. This tutorial is for those who have never paper pieced and may think the way I do. If most of your quilting has been improv and wonky blocks then you may have picked up some things that work in that wonderful freeform environment that do not particularly work in the accurate art of paper piecing.
Here goes. The original tutorial I used is here. It is a great tutorial but I had some issues that were all my fault but I thought I would share. First, grab last nights leftover cherry pie...wait..no...put that down. Seriously....
You will find the template for the block here. This step is critical. Begin by printing the template on printer paper. At this point take your paper a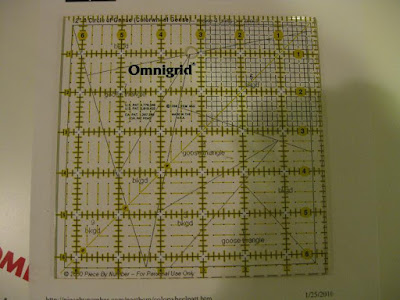 nd place your 6.5 inch ruler over it.
 nd place your 6.5 inch ruler over it.
If it does not line up EXACTLY with your ruler you will need to increase your template accordingly. With mine, I had to increase my printer setting to 107%. make sure it is exact. Yours may be right or completely different than mine. Play with it until it is perfect.

The next step for success was paper choice. I used artists tracing paper. It comes in a large tablet. I got mine at michaels. I use it for tons of stuff. You need it anyway....trust me.
I cut it down to 8x11 and fed it through my printer. It helped to place a piece of printer paper behind it to help feed it into the printer. At that point it went through smoothly. If it does not keep trying with the stiffer paper behind it. It took me several attempts and I think it is worth it in the end. Take care taking it out as the ink is very wet. make four of them per block. Check each of them against the ruler when dry. Print out 4 extra templates on printer paper, check these as well. You now have 4 templates on tracing paper and 4 on printer paper.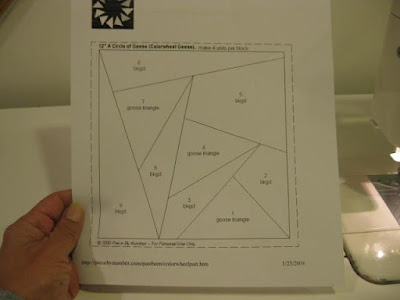


The next is more template prep. Take your 4 printer paper templates and cut out each piece a little larger than they are.
I have no idea why this picture is sideways but you get the idea. you will need all 4 pages to get all of the pieces cut. By the way...I am no sewing photographer so forgive some of the blurry pics and the very dry sewing hands...I am need a mani/pedi...back to this.

Once you have these cut it is time to prepare your fabric. take the time to cut all of the pieces. it will save time in the end.
Take your fabrics of choice and trace around them...I use the chalk pencil I bought at joanns. I love the thing. it stays put until you pat it out and has  several colors for all colors of fabric. I highly recommend that little purchase.
I highly recommend all purchases..hehe.
 several colors for all colors of fabric. I highly recommend that little purchase.
I highly recommend all purchases..hehe.

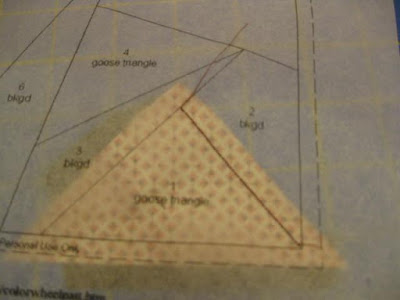
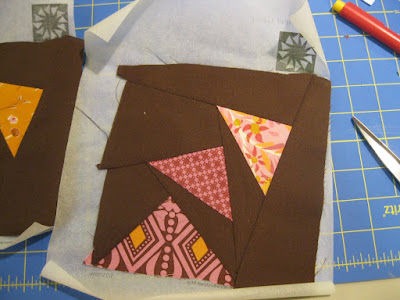
I am showing the base fabric here but you will do the same with each piece of fabric you are using. I chose twelve "geese" fabrics so I cut twelve triangles from the triangle template which is number 1, 4 and 7. of course you only need one of those as they are all the same size.
 *note* If you are fussy cutting the triangles you need to place your fabric behind the tracing template before cutting it. Decide where you want it and mark it before cutting it out. You do not want a gnome with no head.....
This is what you should have when you are through. Twelve triangles and four piles of each numbered fabric.

Now it is time to make the block. This is really easy. take piece number one and place it right side up on the back of the tracing paper template. make sure it is 1/4" over all lines and especially make sure it reaches the bottom seam line. you DO NOT want to come up short.

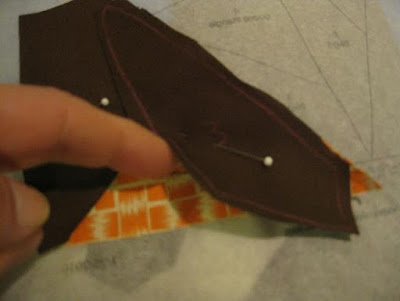
Because of this i am going to recommend pinning heavily during this block. this is the first pin. pin this in place as you are going to be flipping the paper back and forth.

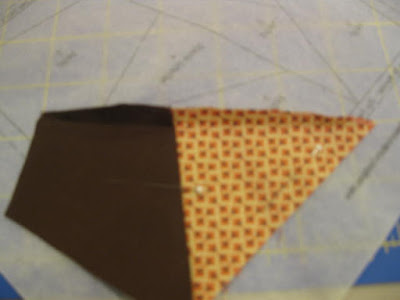
Flip block over and make sure it is positioned correctly. now fingerpress a mark right along the line of the template. you want to place the next template piece correctly. you will know this by its shape and what happens when you "butterfly" the piece out. Once you have it. pin this piece (away from the sewing line). Flip and sew down the first line.


You can clearly see where you are sewing and if you have enough fabric but I take a peek underneath to make sure no fabric has turned on itself (can you tell this has happened?) When you have finished you will see your perfect little seam. *note* I set the stitch length very short 1.4 so the foundation paper is easy to remove.


Now you have two pieces that are now one. Start again by fingerpressing right along the line. Piece 3 now is placed. Because you cannot iron press between piecing I pin all three places. I want the "geese" not to bunch so i pull it taut and pin. You are always going to sew on the face up side of the template (Watch the pin placement!) Broken needles are not good!


Sew along the next line and repeat. Fold fabric on the line.
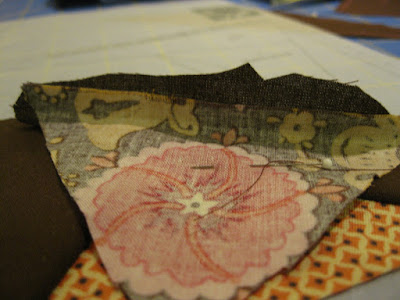
Place next template piece, nestle and fold both. Pin, flip and sew.
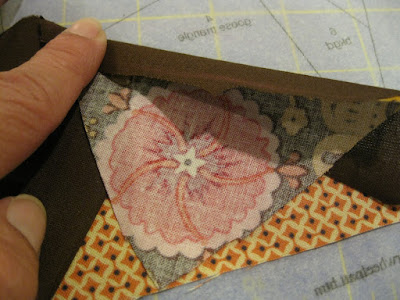
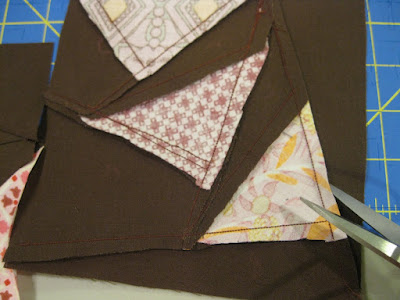
Once you have completed a seam you may trim the excess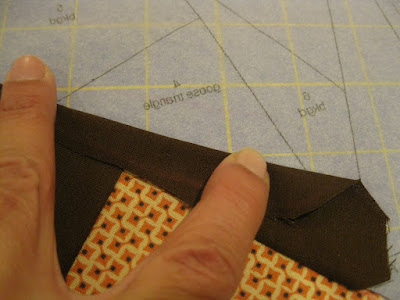 fabric away. Be extremely cautious not to cut away so much that the next piece will be short. Always open the butterfly fold before you sew or cut away fabric so you can see where the next piece will go.
Once you have completed a seam you may trim the excess
 fabric away. Be extremely cautious not to cut away so much that the next piece will be short. Always open the butterfly fold before you sew or cut away fabric so you can see where the next piece will go.


Hang in there, we are almost done!
Continue this process in order until all four blocks are complete. At this point go ahead and press them fabric side UP. Leave the template on.
Place template side up and rotary cut along the outside line.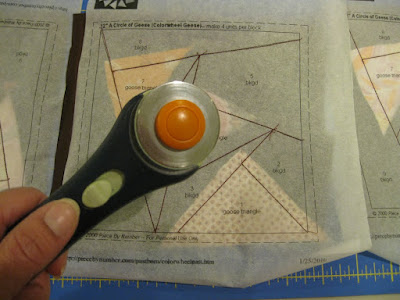

Place template side up and rotary cut along the outside line.


You should now have four perfect 6.5 inch squares.
Remove the template. It should easily pull away. You may have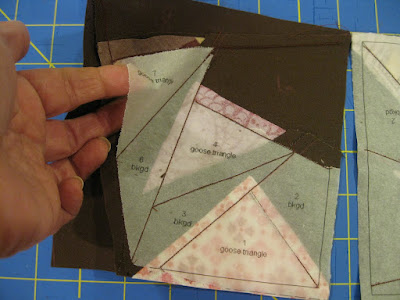 to flick a few teeny pieces away in tight areas but it is easy. When you have all the templates removed you can once again take the time to trim back any seams that are too wide. This is especially important if your base color is white or another light color. Be extra careful where you are cutting!!! You can imagine....I know you can.....aacckkk.
Remove the template. It should easily pull away. You may have
 to flick a few teeny pieces away in tight areas but it is easy. When you have all the templates removed you can once again take the time to trim back any seams that are too wide. This is especially important if your base color is white or another light color. Be extra careful where you are cutting!!! You can imagine....I know you can.....aacckkk.
We are in the home stretch. Press your squares again. Eyeball your arrangement of geese until you like the layout. Hopefully you did a little of this before you began but if you didn't you still have some control. Sew two of the squares facing each other 1/4" seam, pin it well and press the seam to one side.

With the second set you will press the seam to the opposite side. This is 101 to you guys I know but I have to cover my bases.
Make sure when you connect both pairs  of squares that the center seams are opposite and "lock" into that familiar little square!
 of squares that the center seams are opposite and "lock" into that familiar little square!
When you complete this last seam, open,
press and guess what!!!! You should be able to place your 12.5 inch ruler on it and this is what it will look like....
a perfect 12.5 inch circle of geese block.
Pat yourself on the back for completing your block!
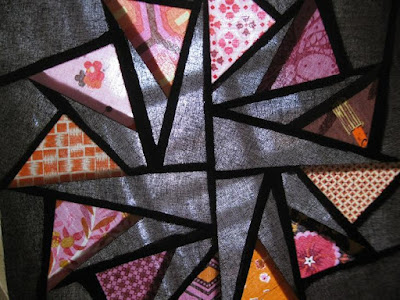
I love the way they look with the light behind them.................Thanks and I sincerely hope that you understand this and do not come away more confused. If you have questions I will be happy to answer them...
hugs,
leslie